
![]()
This tutorial is from BeaSol who
I thank for letting me translate his tutorials.
*
Original here

*
Tubes

*
Material

*
Plugins
Unlimited 2.0/ Distortion Filters/Smelter 2
VM Natural/Weave Distortion
MuRa's Meister/Copies
DCLayer/DCmergency
SCRIPT
1.
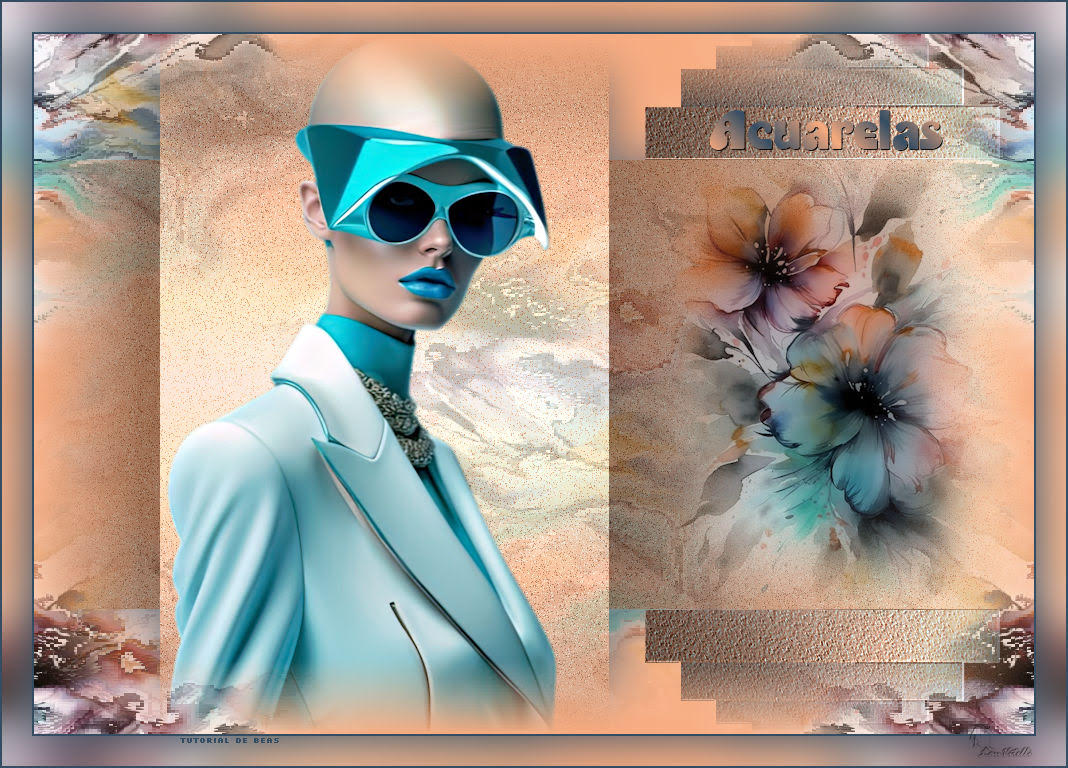
Colors used in the original version:

Color 1: #ad9040
Color 2: #492263
Open a new transparent image measuring 1000x700px
Paint with color 1
2.
Selections / Select All
Copy the tube [flores-441-beas-misted] and paste it into the selection
Select none
3.
Effects / plugins / Unlimited 2 / distortion Filters / smelter 2

Effects / Image Effects /
Seamless Tiling

Add new layer
4.
Paint the layer with color 1
Adjus t/ Add/Remove Noise / Add Noise

Effects / plugins / Unlimited 2
/ VM Natural / Weave Distortion

5.
Layers/Properties/Opacity: 71%
Activate the Selections Tool / Custom Selection and configure:

Selections / Promote selection
to layer
6.
Select none
Effects / Plugins / Mura's meister / Copies - Color 2

Activate the Selections Tool /
Custom Selection and configure - same as above
7.
Press Delete on the keyboard
Select none
Layers/Duplicate
8.
Image / Mirror / Mirror Vertical
Merge down
Effects / user defined filter / emboss 3

9.
Activate the Raster 2 layer
Drop shadow: 0 0 100 70 black
Activate the top layer - Promoted Selection
10.
Drop shadow: 0 0 100 70 black
Merge down
Copy the flower tube and paste as a new layer
11.
Image/Resize: 70% - all layers unchecked
Position to the right, inside the frame according to the model
Copy the tube character [woman-446-beas-tube] and paste it as a new layer
12.
Image/Resize: 60% - all layers unchecked
Position according to the model or as desired
Layers/Duplicate
13.
Activate raster layer 4
Adjust/Blur/Gaussian blur: 30

Layers / Properties / blend mode:
Multiply
14.
Activate the Raster 1 layer
Layers/Duplicate
Layers / Arrange Bring to top
15.
Effects / Reflection Effects / Rotating Mirror - default

Effects / Plugins / DCLayers /
DCMergency

Prepare a Linear Gradient

16.
Open the tube [text] (it will be selected)
Paint the selection with the gradient above
Select none
17.
Copy the text and paste it into your work
Activate the Pick tool and configure: X=675.00 / Y=76.00

Edit / copy special / Copy
Merged (will remain in memory)
18.
Image / Add borders / 2px / color 2
Selections/Select All
Image / Add borders / 30px / color ffffff
19.
Selections/Invert
Paste the image copied above into the selection
Adjust/Blur/Gaussian Blur: 20

20.
Selections/Invert
Drop shadow: 0 0 100 70 black
select none
21.
Image / Add borders / 2px / color 2
Image / Resize: width=1000px
Put your signature
Merge All
Save as jpeg


Sem comentários:
Enviar um comentário