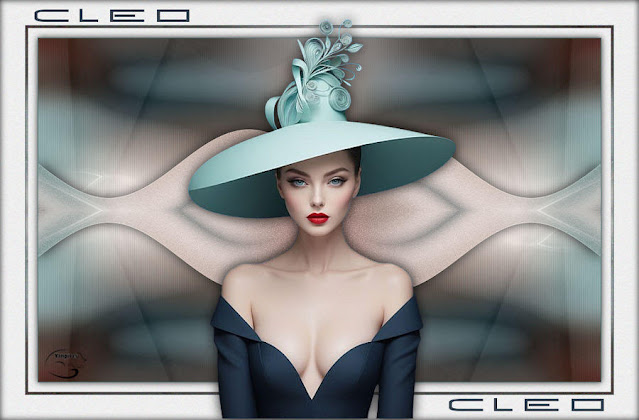
![]()
This tutorial is from Tshaka to whom I thank you for letting me translate your tutorials.
Original here
Tubes
Material
Many thanks to the creators of these materials

Plugins
&<Bkg Kaleidoscope> - 4QFlip
UpperL
Andrew's Filter Collection 56 - Brian And Geralyn Cocktail Mix;
A Bit Left Over Gradient
You can find these plugins on the websites of:
You can also find this tutorial translated into these languages:
(Click on the flag)
SCRIPT
Observations:
> Open the material / duplicate (Shift+D) / Close the Originals
> Change the layers blend mode to match your colors.
> In the antique versions of PSP the horizontal mirror = mirror / vertical
mirror = flip / pick tool = deformation
1. You will need a main tube
2. Open the mask in PSP and minimize
3. Choose a light color from your tube to the foreground and a dark color for
the background
4. Open a new transparent image with 900x550px
5. Paint the image with the color of the foreground
6. Selections / SELECT ALL
7. Add a new layer
8. Copy your main tube and paste it in the selection
9. SELECT NONE
10. Effects / Image Effects / Seamless Tiling
29/2
11. Merge Down
12. Adjust / Blur / Gaussian Blur: 15
30/3
13. Adjust / Blur / Radial Blur
31/4
14. Effects / plugins / unlimited 2 / bkg kaleidoscope / 4qflip upperl
32
15. Activate the Selection Tool / Custom Selection and configure according to
Print
34/5
16. Selections / Promote Selection to Layer
17. Layers / Duplicate
18. Effects / Plugins / Unlimited 2 / Andrew's Filters Collection 56 / Brian and
Gerais Cocktail Mix - Default
35
19. Layers / Properties / Blend Mode: Luminance (L)
20. Merge Down
21. Adjust Sharpness / Sharpen
22. SELECT NONE
23. Effects / Detortion Effects / Wave
36/6
24. Effects / plugins / unlimited 2 / bkg kaleidoscope / 4qflip upperl - equal
to the previous
37
25. Drop Shadow: 0 0 85 30 Black
26. Activate the lower layer - Raster 1
27. Effects / Texture Effects / Blinds - Background Color
38/7
28. Layers / Duplicate
29. Effects / Plugins / Unlimited 2 / Andrew's Filters Collection 56 / A Bit
Left Over Gradient - Default
39
30. Activate the Selection Tool / Custom Selection and configure according to
Print
40/8
31. Press delete on the keyboard
32. SELECT NONE
33. Layers / duplicate
34. Image / Mirror / Horizontal Mirror
35. Merge Down
36. Layers / Properties / Blend Mode: Luminance (L)
37. Add Nova Layer
38. Paint with white color
39. Layers / New Mask Layer / From Image / Mask [Narah_Mask_1418]
41/9
40. MERGE GOUP
41. Effects / plugins / unlimited 2 / bkg kaleidoscope / 4qflip upperl
42
42. Layers / duplicate
43. Effects / Detortion Effects / Wave
43/10
44. Effects / Image Effects / Seamless Tiling
44/11
45. Layers / Properties / Blend Mode: Dodge
46. Activate Layer - Group - Raster 2 (third from the top)
47. Layers / arrange / bring to top
48. Image / add borders / 1px / bckground color
49. Copie (will be in memory)
50. Image / add borders / 15px / white
51. Selections / SELECT ALL
52. Image / add borders / 5px / white
53. Selections / Invert
54. Cole in the selection the image that is in memory
55. SELECT NONE
56. Image / Add Borders / 40px / White
57. Selections / SELECT ALL
58. Selections / Modify / Contract = 60
48/13
59. Selections / Invert
60. Effects / Plugins / Unlimited 2 / Andrew's Filter Collection 56 / Brian ADN
Generalyn Cocktail Mix
45
61. Effects / 3D Effects / Coutout
46/12
61b. SELECT NONE
62. Open the text [text-core-tsha]
63. Click one of the letters with Magic Wand to select
64. Using Change Color, paint the letter with the color of the background
N.T.: In my version, I couldn't do it, but no problem, it's optional
65. Copy and paste it as a new layer in your work
66. Copy your main tube and paste it like a new layer
67. Make the adjustments you find necessary
68. Position how to wish
69. Drop Shadow: 0 0 85 30 Black
70. Image / add borders / 1px / background color
71. Put the signatures
72. MERGE ALL
73. Save as JPEG

Obrigada Vanpires


Sem comentários:
Enviar um comentário