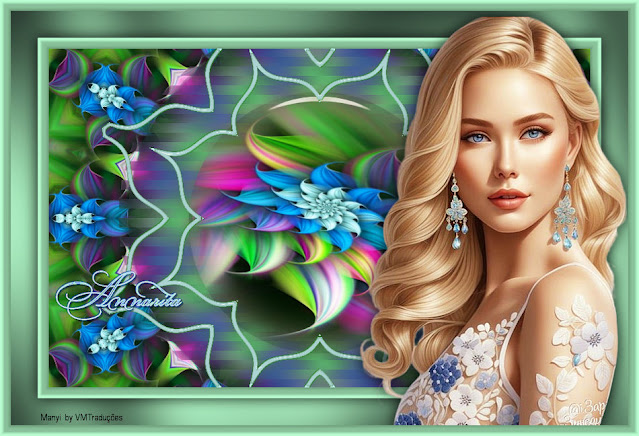
This tutorial is by Manyi, who I thank for permission to translate
*
The original tutorial was made on PSP 2020
The translation was done on the PSP X9
*
Tube: VM Tubes
*
Plugins used:
Graphic Plus /Cross shadow
Eye candy 5: Impact/Glass
*
Material:
> Save the selections in the PSP's Selections folder
> Save the mask in the Masks folder on the PSP
>All material was created by the author
*
SCRIPT
Choose two colors: a dark color and a light color.
In the original tutorial these colors were used:
dark: #1e4768
Clara: #8eb5de
*
If you don't have the G'MIC-QT plugin, you can download it by clicking on the link above in the list of plugins
*
Click on the images to enlarge the size and improve the view. You can also copy the image and open it on PSP
*
1. Open image [alapkép] / Copy and paste as new image / close original image
2. Effects / Plugins / GMIC-QT / Arrays & Tiles / Array(faded)
N.T.: This plugin opens outside the PSP. Look at the icon on the Windows taskbar:
Note: After applying the plugin, a window may appear for you to save the effect. Open a folder and save
3. Effects / Plugins/ GMIC-QT / Testing / Joan Rake / Deformations / Kaleidoscope Layer Cake
4. Minimize this image, we will use it later
Open the [alapkép] image again
5. Image / Rotate right
6. Layers / Load/ save mask/ load mask from disk / Mask [ovale-mask]
7. Merge Group
8. Copy this image
Maximize working image
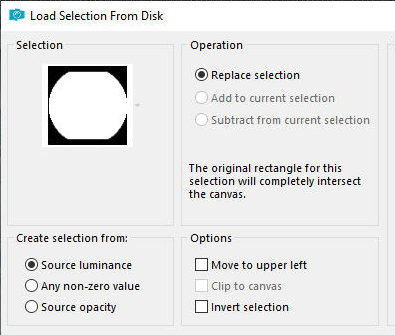
9. Selections / Load save selections / Load selection from disk / selection [annarita_selection]
10. Layers/New Raster Layer
Paste the image copied above into the selection. Paste twice
11. Keep the selection
Effects / Plugins / Eye candy 5: Impact / glass
12. Select none
13. Close the eye of the top layer
Activate the bottom layer
14. Selections / Load/save selection / Load selection from disk / Selection [annarita1]
15. Selections / Promote selection to layer
16. Adjust / blur / Gaussian Blur=15
17. Select none
18. Continue on the layer
Effects / Plugins / GMIC-QT / Testing / Lylejk / Lylejk Ripple
19.Adjust/sharpness/sharpen
20. Open the eyes on the top layer and activate
21. Activate the ruler: View / Rulers
Activate the Selection Tool (selection type=rectangle)
Select a small strip, the width of the image, starting at a height of 100px and ending at a height of 130 px. See the print.
22. Layers / New Raster Layer
Paint with the light color at the beginning of the tutorial or any other color you wish.
23. Select none
24. Effects / Distortion Effects / Wave
25. Continue on the layer
Effects / Plugins / GMIC-QT / Testing / Joan Rake / Deformations / Kaleidoscope Layer Cake
26. Select the design formed with the Magic Wand
27. Effects / Plugins / eye candy 5: Impact / glass - same as above
28. Select none
29. Drop shadow: 1 1 80 0 dark color from the beginning
30. Repeat Drop shadow with negative V and H
31. Merge All
32. Effects / Plugins / GMIC-QT / Frames / Frame (painting) - light color or any other color you want
Note: the plugin will ask to save to a folder. Save and remember the folder name to open this file on psp
33. Open the saved image
Selections / select All
Image / Add borders / symmetric marked / 40px / light color
34. Selections/Invert
35. Effects / plugins / Graphic Plus / Cross shadow.
36. Selections/Invert
37. Drop shadow: 3 3 50 30 black
38. Repeat Drop Shadow with negative V and H
39. Select none
40. Copy the tube character and paste it as a new layer
Position to the right, depending on the model
41.Adjust/Sharpness/Sharpen
42. Drop shadow equal to that applied in items 37 and 38
43. Merge All
44. Effects / Plugins / GMIC -QT / Frames / Frame(painting)
Save again in the same folder as before
45. Open this file on psp
46. Copy the title [Annarita2] and paste as a new layer
position according to the model or as desired
47. Resize to 900 x 614 px
48. Put your signature
49. Merge All
50. Save as jpeg
*
Thank you for doing my translation
I would love to receive a copy of your version to put on my photo
*
Tutorial translated by Vera Mendes
Do not alter or repost without authorization from the author
11/30/2023


Sem comentários:
Enviar um comentário